Use
usermod command in linux is used to modify an existing user’s account. But, only the superuser can use this command.
Syntax
– usermod [options] LOGIN
Options available with usermod command in linux
1. Add Supplementary Groups
-a : works in combination with -G option. Refer -G option for details
2. Add value to the Comment/GECOS field
-c : adds a value to the comment or the so-called GECOS filed in the /etc/passwd file
For Example: The user David has no entry in the GECOS filed as shown in the figure below

Next, we use -c option with usermod and add the full name i.e., “David Warner”. Now, the passwd file shows this updated entry.

3. Change user’s Home Directory
-d : option changes the home directory of the user.
For Example: Consider any user in your system and login with that account.
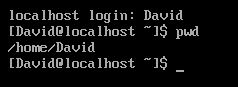
As an example we logged in as David user. Using the pwd command it shows that David’s home directory is /home/David (By default the user always logs into his home directory)
Next, we use -d option to change the home directory to /home/Warner. Make sure that the directory exists (hence we created the directory first at the desired location)

Now, when David logs in again the home directory has changed. The same can be checked in the /etc/passwd file also.

4. Change Expiry Date of Account
-e : sets the date on which the user account will expire. The format of date is YYYY-MM-DD
For Example: First, check the expiry date of any user using the chage command.

The expiry date for David’s account is set to never i.e., the account will never expire. Now, we change the expiry date using -e option with usermod command.

Now, David’s account will expiry on 24th Dec, 2020.
5. Setting the Inactivity period
-f : options sets the number of days after the password expires until the account is disabled permanently. For example:

6. Changing Group to which the user belongs
-g : option is used to change the group to which the user belongs. It can be used either by giving the GID or Name of the new group. For example:
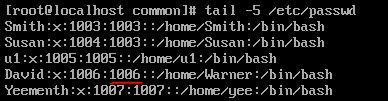
David belongs to the group having GID 1006. We use -g option to change the group to 1005.

As seen above, David’s group is now changed to 1005. Now, both David and u1 are members of the group 1005.
Note: The new group to which the user is assigned must already exist.
7. Assign Supplementary Groups
-G : option assigns a user to new groups, in addition to the primary group. This is required if a user is working on multiple projects and for each project a separate group is created in the system. Remember, a user can have only one primary group but multiple supplementary groups. For example:

The above-shown command adds David to two supplementary groups – 1003 and 1002.
Note: 1. On adding a user to new supplementary group(s), it is deleted from any existing supplementary group but if you still want the user to be part of earlier supplementary groups then use -a option along with -G.
2. The group number (1003,1002) should be separated by comma and without space.
8. Change Login Name
-l : option changes the login name of the user.
For Example: Look at the list of users below. Let’s change the login name of user1 to User

Now, we use -l option to change the login name. The updated content shows the user name has changed. Rest of the information related to the user is unchanged.

9. Lock User Password
-L : This option locks the user password.
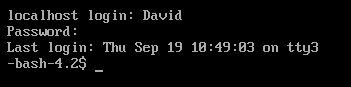
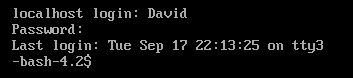
For Example: The user David logs into his account, as usual, using his password as shown below
Suppose, the admin decides to lock David’s password. So, he will use -L option as

Now, when David tries to login the next time, he gets an error i.e. Login incorrect.

10. Move content from Current Home Directory to New Home Directory
-m : option is used in combination with -d option to shift the content of orginal home directory to the newly allocated home directory.
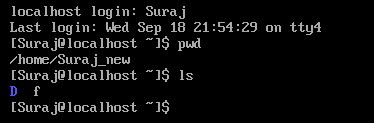
For Example: Let’s consider a user Suraj whose home directory /home/Suraj contains a file “f” and a directory “D” as shown in the figure below.

Now, we user -m option along with -d option to change the home directory and shifts the content of old home directory to the new one.

After the change the new directory shows the transfer of the original file “f” and directory “D”.
11. Change user Password
-p : option sets the user password. Try avoiding the use of this option as the password will be visible to users.
For Example: We change the password of user Suraj using –p option.

Next, if we look at the contents of /etc/shadow file the newly set password is clearly visible.

12. Change Login Shell
-s : option changes the login shell of the user. The number of available shells in the system can be checked in /etc/shells file.
For Example: The current shell for Suraj is /bin/bash.
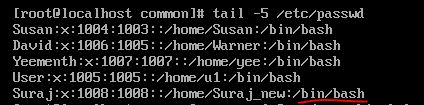
Next, we change the shell using -s option.

The updated shell entry can be seen in the above figure.
13. Change UID
-u : option changes the UID assigned to any user.
For Example: The current UID of Suraj is 1008

Now, if as an admin you want to assign him the UID 2020.

The updated UID is visible in the /etc/passwd file

14. Unlock user Password
-U : option unlocks the password locked by -L option. For example:

Now, the locked user David (see -L option) will be able to login again.